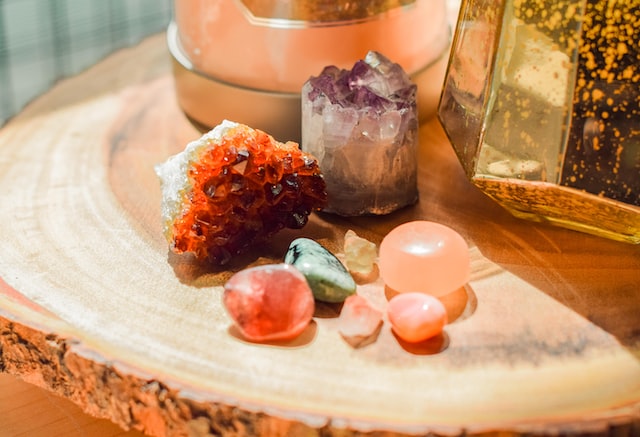
Making a resin crystal is a great way to add a little sparkle and shine to any home décor. But, before you get started making your own crystals, it’s important to understand the basics of the process and what supplies you need to do it properly. This beginner guide will walk you through all the steps necessary for making resin crystals like a professional. From gathering materials, to creating the design and everything in between, we’ll cover all the details so you can start producing your own crystals with ease.
What do you need to make a resin crystal?
In order to make a resin crystal, you will need the following materials:
-Resin
-Curing agent
-Measuring cups
-Spoons
-Stirring stick
-Gloves
-Protective eyewear
-Ventilated work area
-Mold or beaker
-Powder or glitter (optional)
The steps to making a resin crystal
Resin crystals are a beautiful and unique way to add a touch of luxury to your home. making them is easier than you might think, and with a little practice, you can be a pro in no time! Here are the steps to making a resin crystal:
1. Start with a clean work surface and gather your supplies. You will need resin, hardener, mixing cups, stirring sticks, gloves, and a dust mask.
2. Measure out the correct amount of resin and hardener using the mixing cup. Be sure to follow the manufacturer’s instructions for the ratio of resin to hardener.
3. Mix the resin and hardener together thoroughly for at least 2 minutes. Use one of the stirring sticks to scrape the sides and bottom of the cup as you mix so that all of the ingredients are fully combined.
4. Once the mixture is completely mixed, it’s time to pour it into your mold or casting material. If you’re using a mold, make sure it is lined with release agent so that your finished piece will come out easily.
5. Allow the piece to cure according to the manufacturer’s instructions. This usually takes 24-48 hours. Once cured, remove it from the mold or casting material and enjoy your new resin crystal!
Tips for making a perfect resin crystal
If you want to make a perfect resin crystal, there are a few things you need to keep in mind. First of all, you need to make sure that your work surface is clean and free of any debris. You also need to make sure that your resin is at the correct temperature. If it is too cold, it will be difficult to work with and if it is too hot, it will be more likely to cause bubbles.
Once you have your work surface and resin ready, you need to mix the two together thoroughly. You can use a spatula or other tool to do this. Once they are mixed together, you need to pour the mixture into your mold or shape. You should then tap the mold lightly so that any air bubbles rise to the surface.
After the mixture has set for a few minutes, you can then remove the crystal from the mold. If there are any small air bubbles on the surface of the crystal, you can pop them with a needle or toothpick. And that’s it! You now have a beautiful resin crystal that is perfect for display or use in jewelry.
How to store your resin crystal
Resin is a versatile material that can be used for a variety of applications, including creating crystals. While it is possible to purchase pre-made crystals, many people enjoy the challenge and satisfaction of making their own.
If you are new to working with resin, there are a few things you should know before getting started. In this article, we will walk you through the basics of how to make a resin crystal, as well as some tips for storing your finished product.
To get started, you will need:
-Resin (we recommend epoxy resin for beginners)
-Crystal molds
-Glitter or other decorative additives (optional)
-A mixing container
-A stirring stick
-Protective gloves and eye wear
Once you have gathered your supplies, mix your resin according to the manufacturer’s instructions. If you are adding glitter or other additives, mix them in now. Once your resin is mixed, pour it into the crystal molds. Allow the crystals to cure for 24 hours before removing them from the molds.
Your finished crystals can be stored in an airtight container in a cool, dark place. If you thinking about where to buy crystal then heading to the best resin art shops and buy your art work. Avoid exposure to direct sunlight or excessive heat, as this can cause the crystals to warp or discolor over time. With proper care, your resin crystals will last for years to come!
Making A Replica
When it comes to making replicas, there are a few key things you need to keep in mind. First, you need to make sure that the mold is clean and dry before you pour in the resin. Any moisture or debris will cause the resin to not cure properly. Second, you need to be very precise when measuring out the amount of resin and hardener you’ll need. Too much or too little of either can cause problems with the curing process. Finally, once you’ve mixed together your resin and hardener, you need to pour it into the mold quickly and evenly. If you don’t, the resin will start to set up before it’s fully in the mold, which can create imperfections in your replica.
Crushed Glass
If you’re looking to add a little extra sparkle and shine to your resin projects, then crushed glass is a great way to do it! You can buy crushed glass in a variety of colors, or even make your own by crushing up old bottles or vases.
To use crushed glass in your resin project, you’ll first need to mix it with a clear adhesive. We recommend using our Crystal Clear Epoxy Resin for best results. Simply mix the two ingredients together until the desired consistency is achieved, then apply it to your project as usual.
The added glass will give your resin piece a beautiful shimmer and refractive quality that is sure to impress. Just be sure to take care when handling the glass, as it can be sharp.
What You’ll Need
If you want to make a resin crystal as a professional, there are a few things you’ll need:
-A mold: You can purchase molds specifically for making crystals, or you can use any kind of mold that you have on hand. Just make sure that it’s clean and dry before you begin.
-Resin: You’ll need a high-quality resin for this project. Make sure to get one that is made specifically for creating crystals.
-Colorants: You can use any kind of dye or pigment to color your resin. This is completely up to you and your personal preference.
-Glitter: This is optional, but if you want to add some sparkle to your crystals, glitter is the way to go. Just make sure that the glitter is fine enough so that it doesn’t end up clumping in the resin.
-Curing agent: This is essential in order for the resin to harden properly. Be sure to follow the instructions on the curing agent bottle carefully.


